Water Filter
Replacement Instructions
All ice and water refrigeration products using water filters 847200 & 847201.
Safety informationAll ice and water refrigeration products using water filters 847200 & 847201.
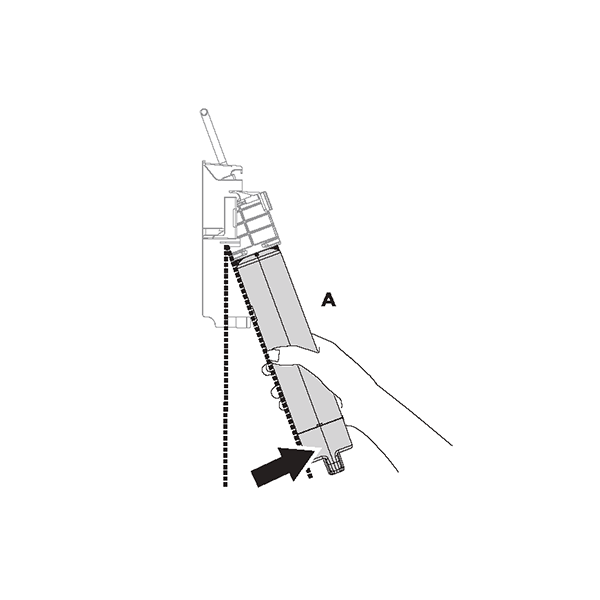
Safety informationNote: It is not necessary to turn the water supply off when installing the water filter. It is easier to remove the water filter with the water turned on.
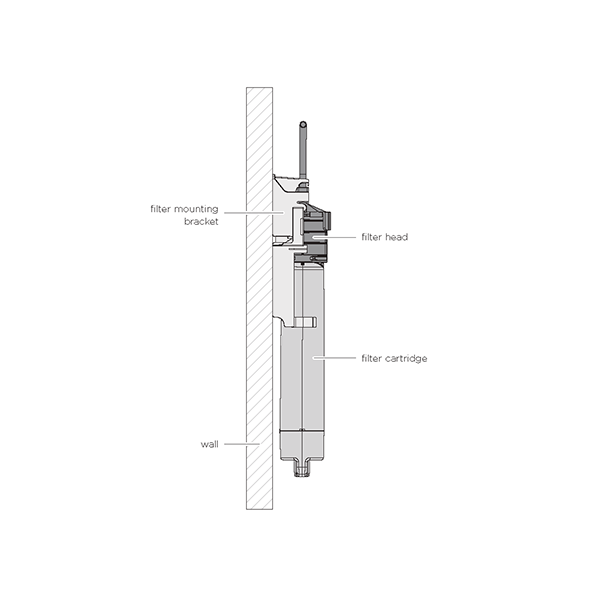
External water filter attached to wall.
Note: It is not necessary to turn the water supply off when installing the water filter.
IMPORTANT!
After installation, the water filter
MUST
be flushed. Refer to
flushing the water filter
for more details.
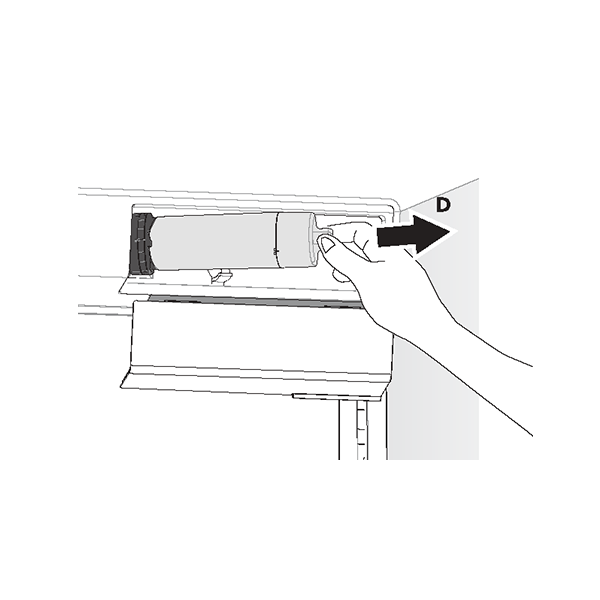
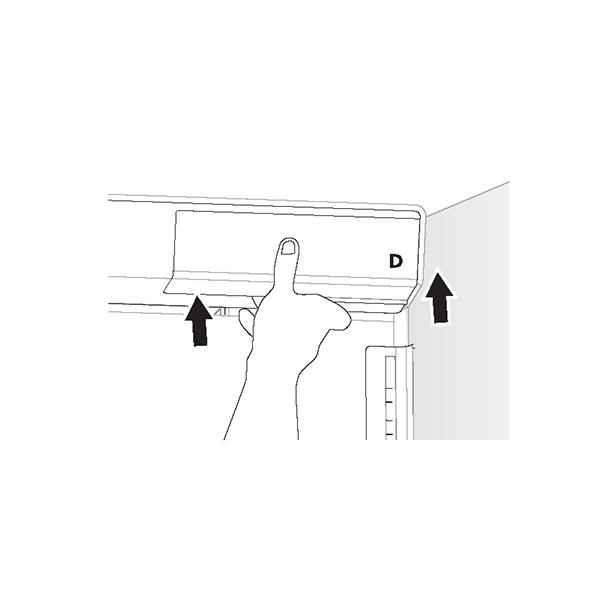
For RF605, RF203, RF523, and RF172 Models
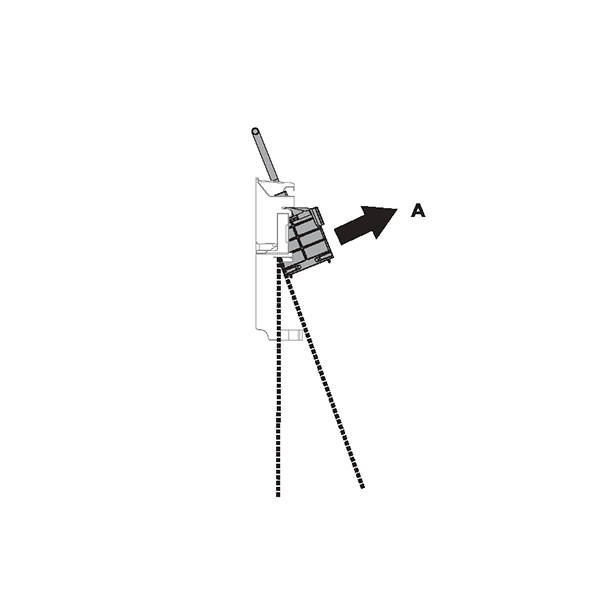
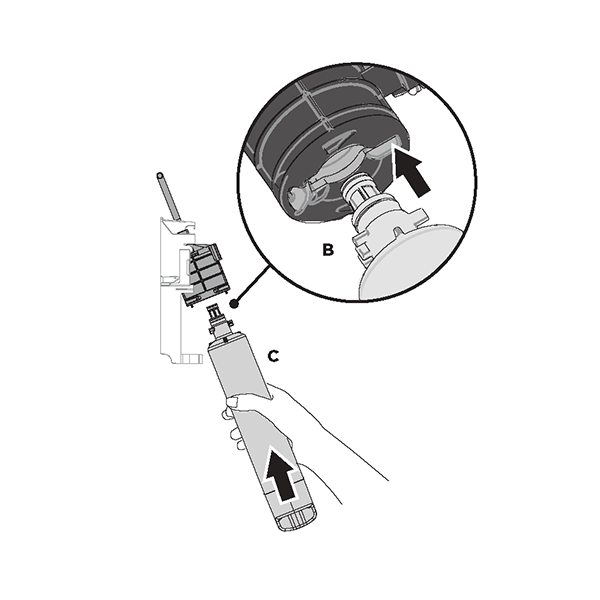
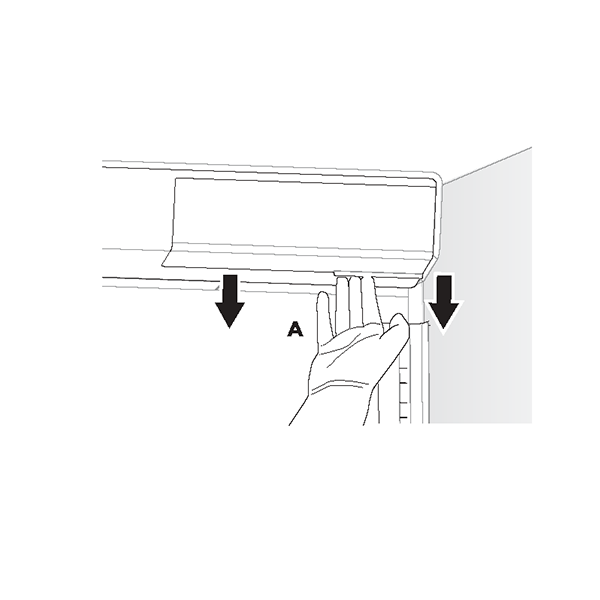
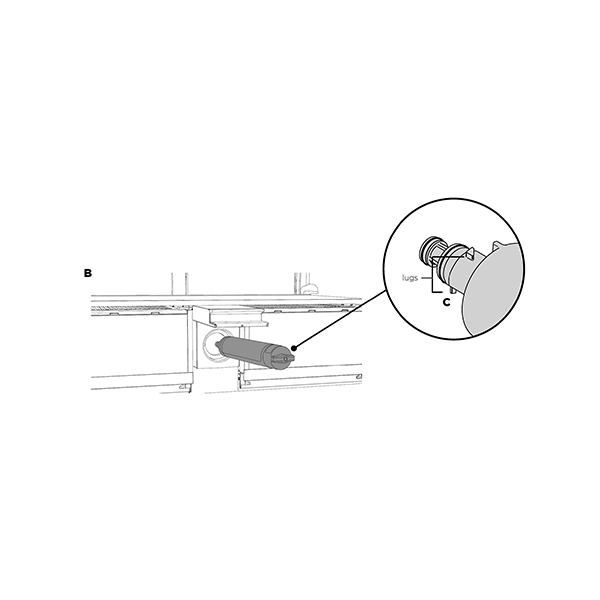
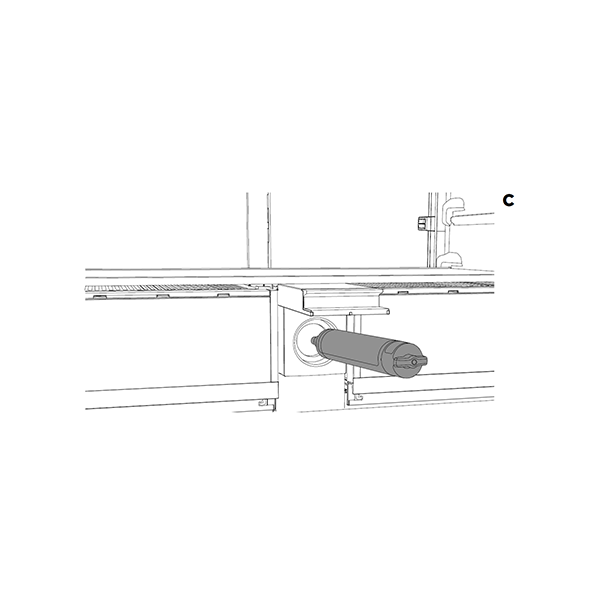
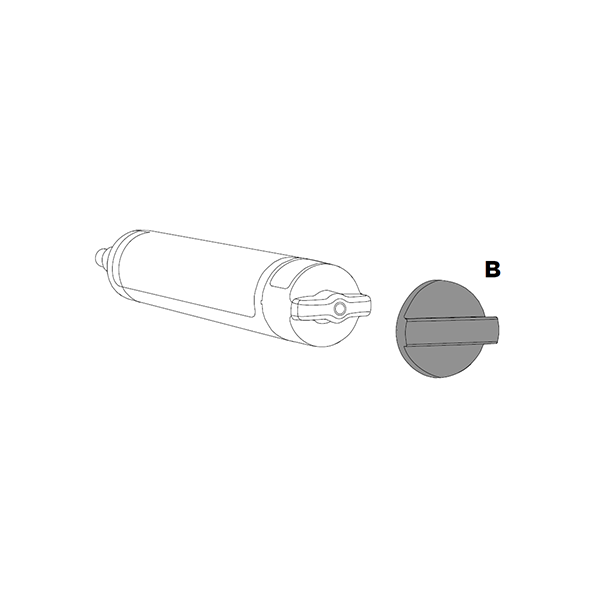
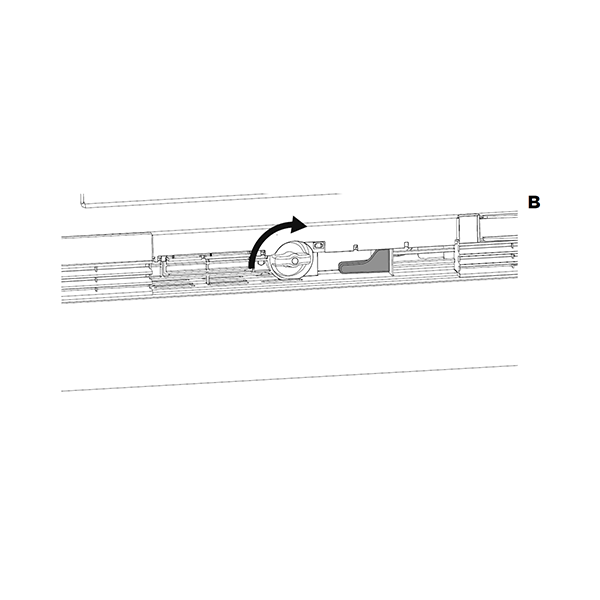
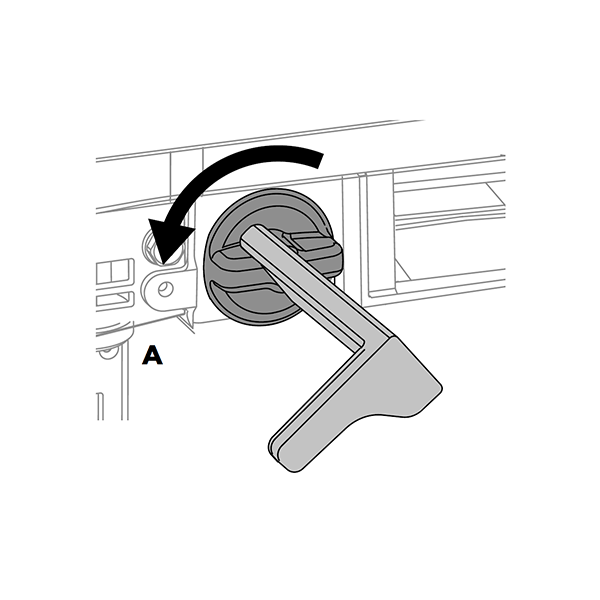
Note: it is not necessary to turn the water supply off when removing the water filter. It is easier to remove the water filter with the water turned on.
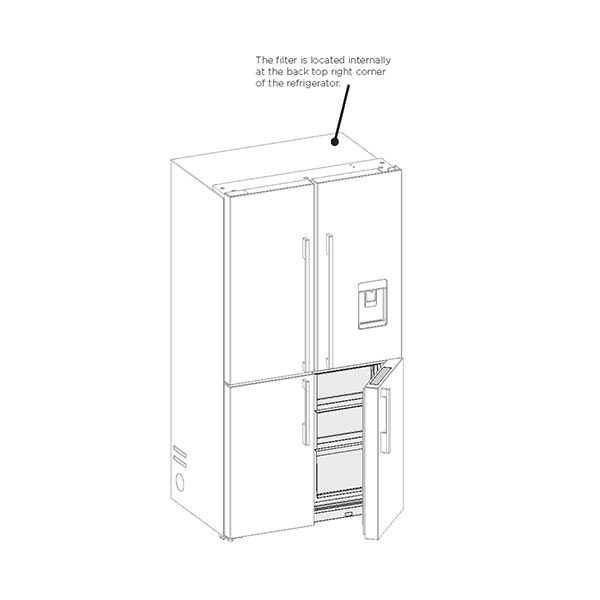
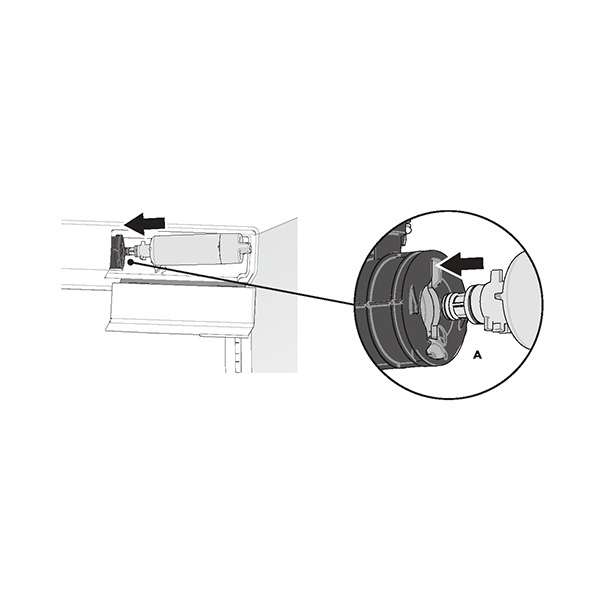
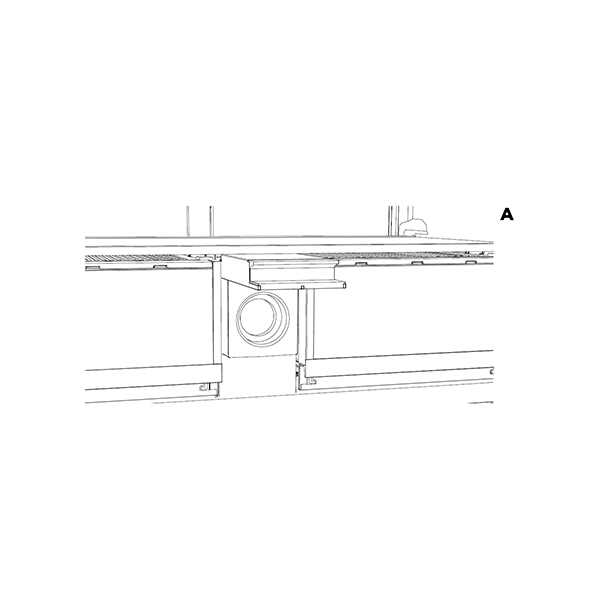
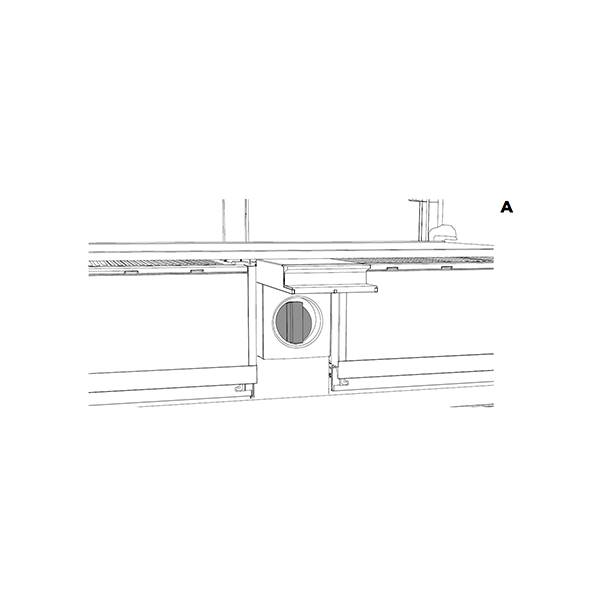
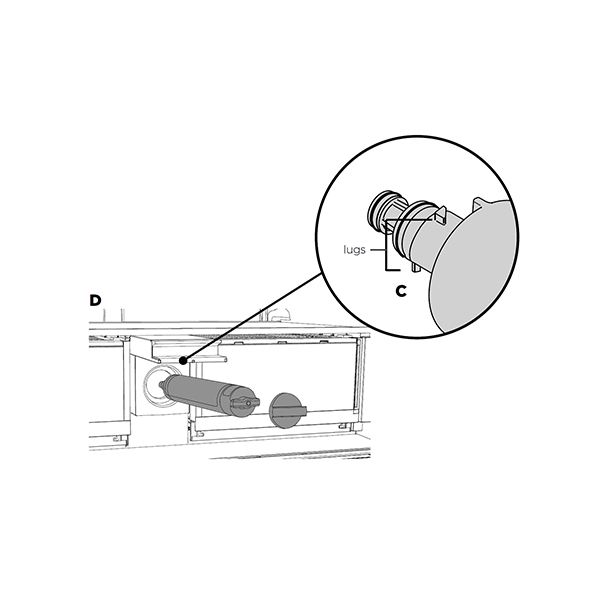
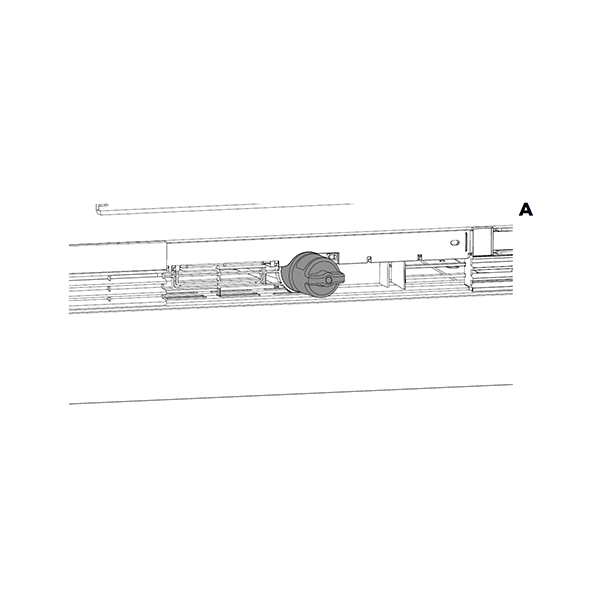
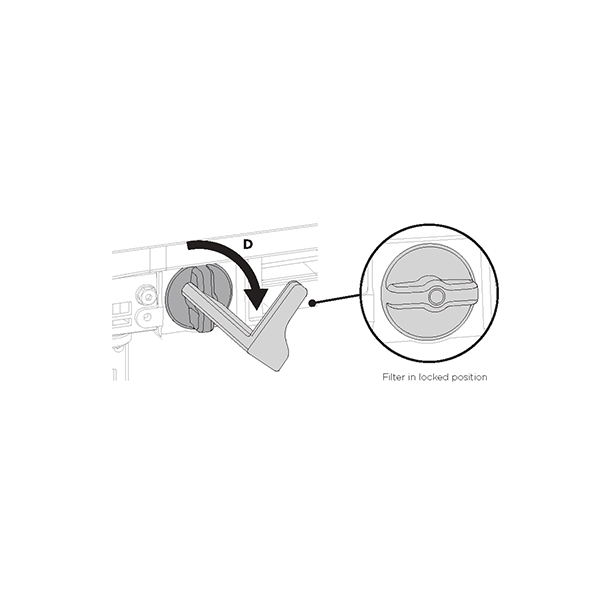
The filter is located internally at the back top right corner of the refrigerator.
Note: Remove the top shelf if you need more space while removing the filter.
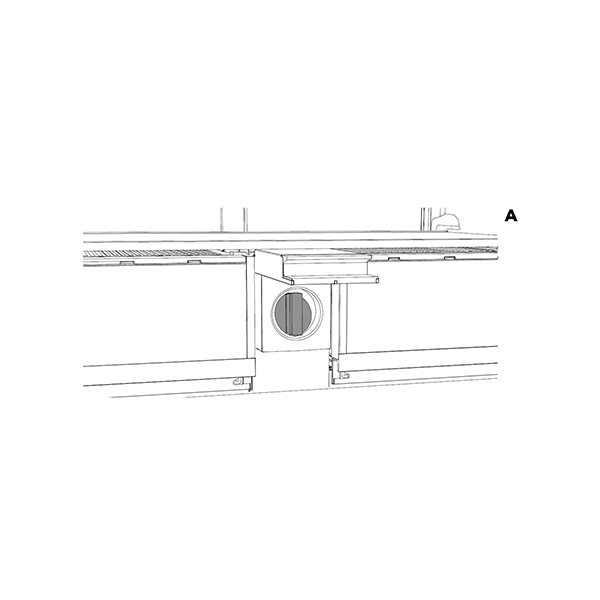
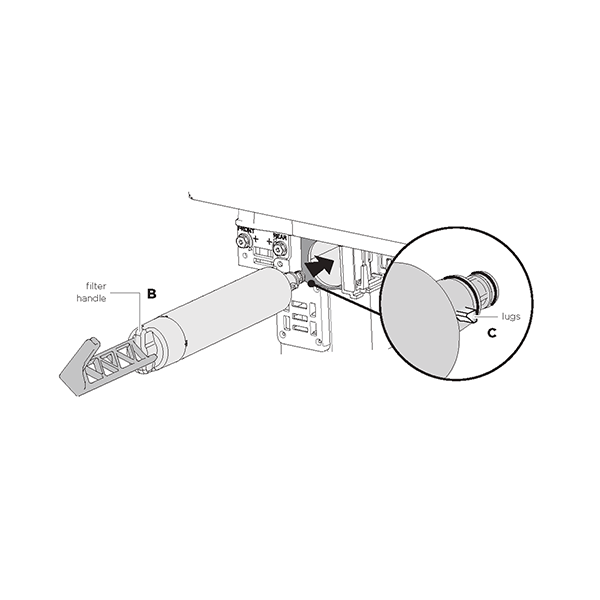
Note: It is not necessary to turn the water supply off when installing the water filter.
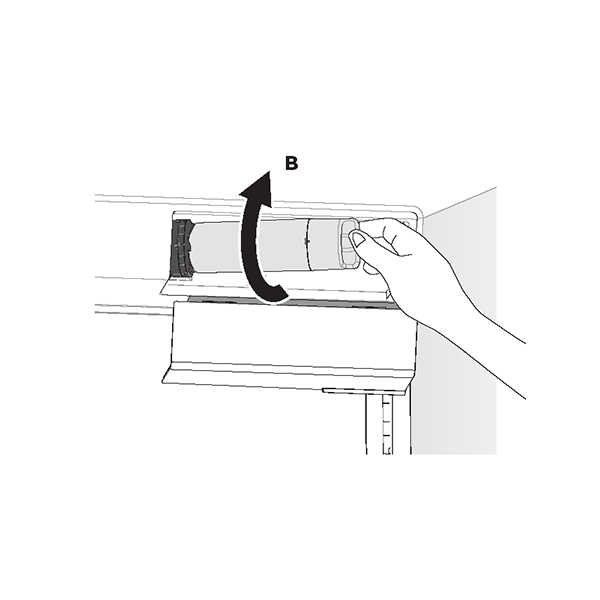
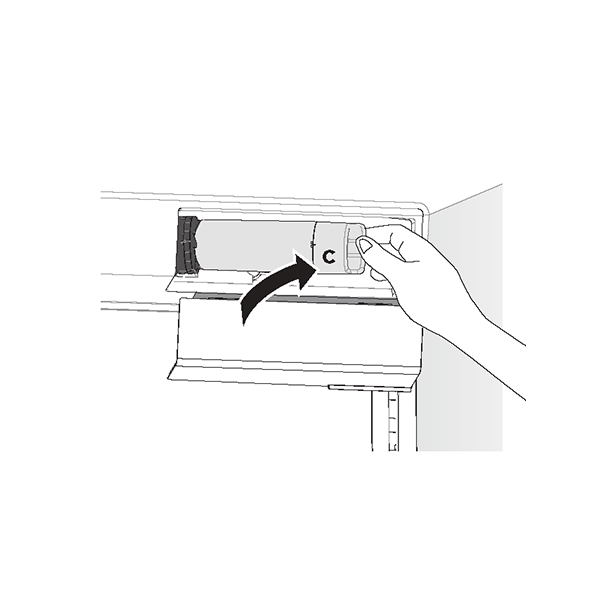
IMPORTANT!
After installation, the water filter
MUST
be flushed. Refer to
flushing the water filter
for more details.
Note: It is not necessary to turn the water supply off when installing the water filter. It is easier to remove the water filter with the water turned on.
Note: It is not necessary to turn the water supply off when installing the water filter.
IMPORTANT!
After installation, the water filter
MUST
be flushed. Refer to
flushing the water filter
for more details.
Note: It is not necessary to turn the water supply off when installing the water filter. It is easier to remove the water filter with the water turned on.

Note: It is not necessary to turn the water supply off when installing the water filter.
IMPORTANT!
After installation, the water filter
MUST
be flushed. Refer to
flushing the water filter
for more details.
Note: It is not necessary to turn the water supply off when removing the water filter. It is easier to remove the water filter with the water turned on.

Note: It is not necessary to turn the water supply off when installing the water filter.


IMPORTANT!
After installation, the water filter
MUST
be flushed. Refer to
flushing the water filter
for more details.
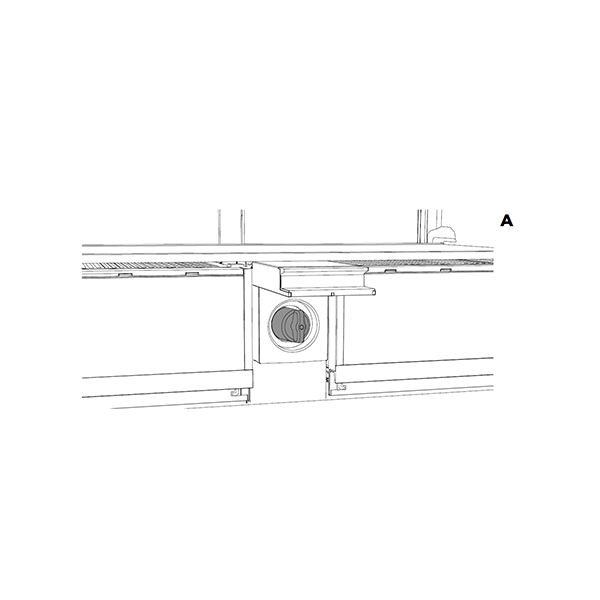
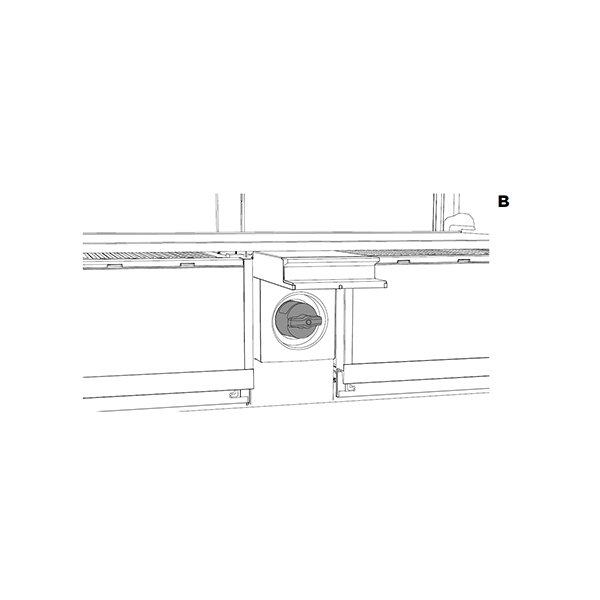
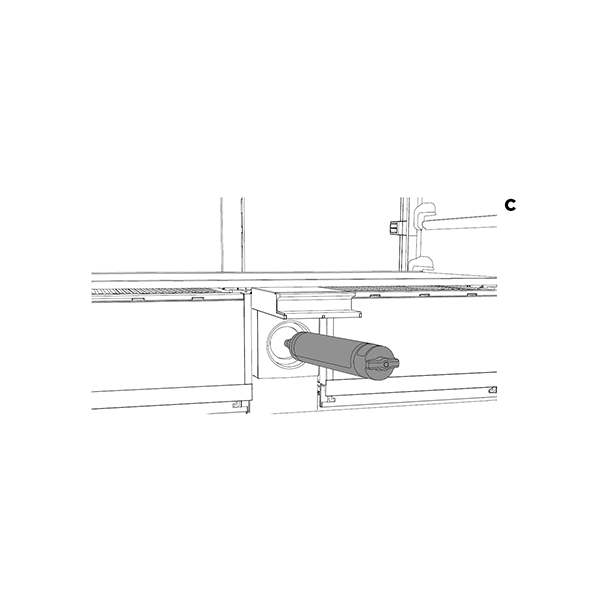
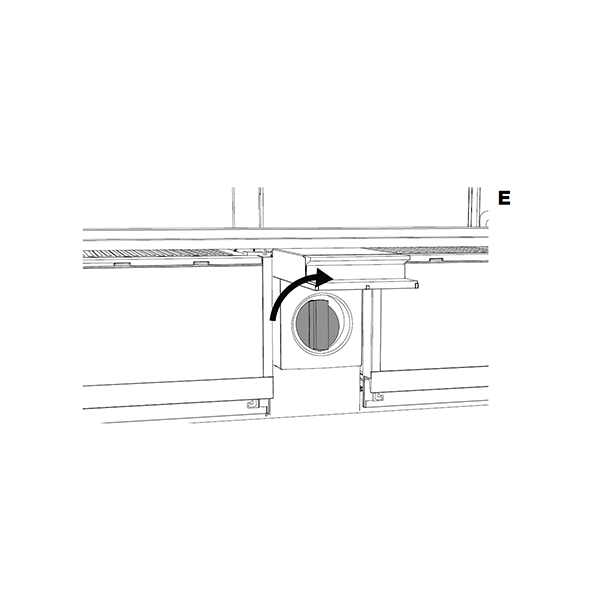
Note: It is not necessary to turn the water supply off when removing the water filter. It is easier to remove the water filter with the water turned on. The filter can be accessed from the side of the drawer.
Note: It is not necessary to turn the water supply off when installing the water filter.
IMPORTANT!
After installation, the water filter
MUST
be flushed. Refer to
flushing the water filter
for more details.
Note: It is not necessary to turn the water supply off when installing the water filter. It is easier to remove the water filter with the water turned on.
Note: It is not necessary to turn the water supply off when installing the water filter.
IMPORTANT!
After installation, the water filter
MUST
be flushed. Refer to
flushing the water filter
for more details.
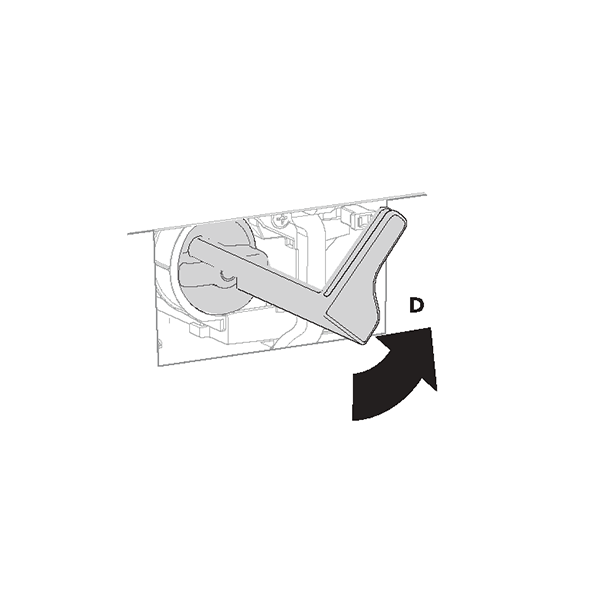
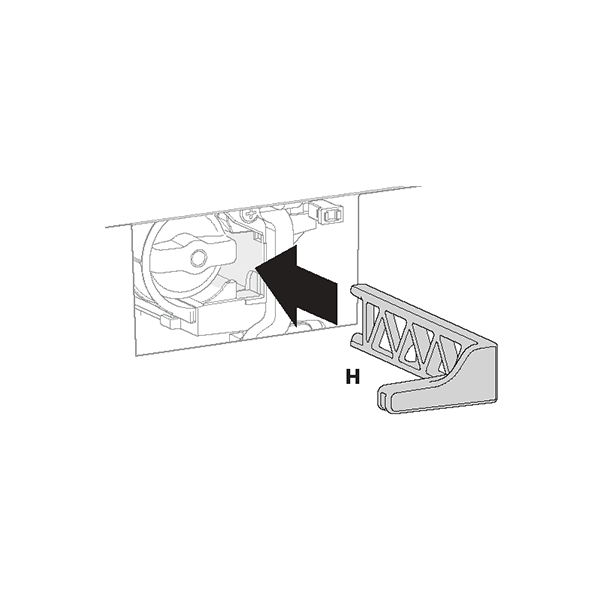
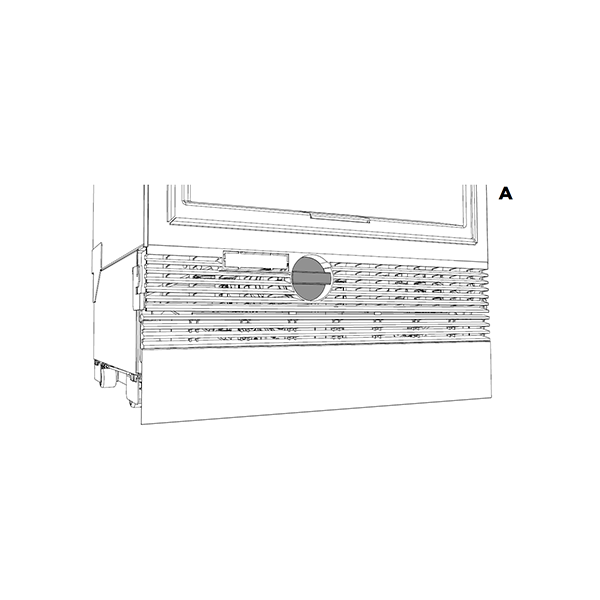
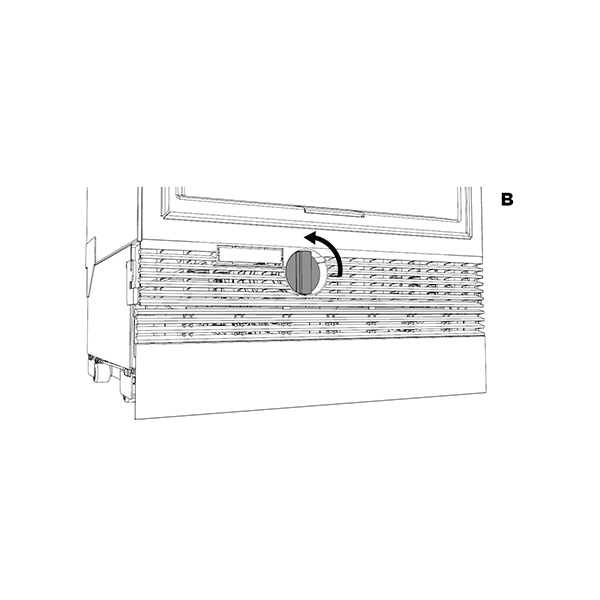
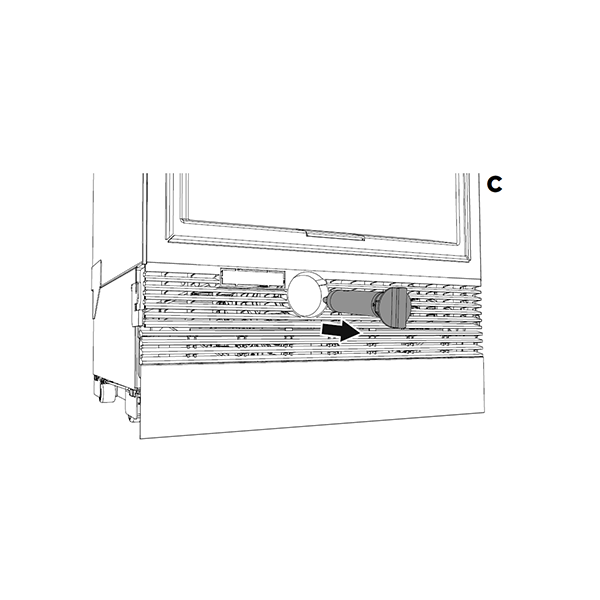
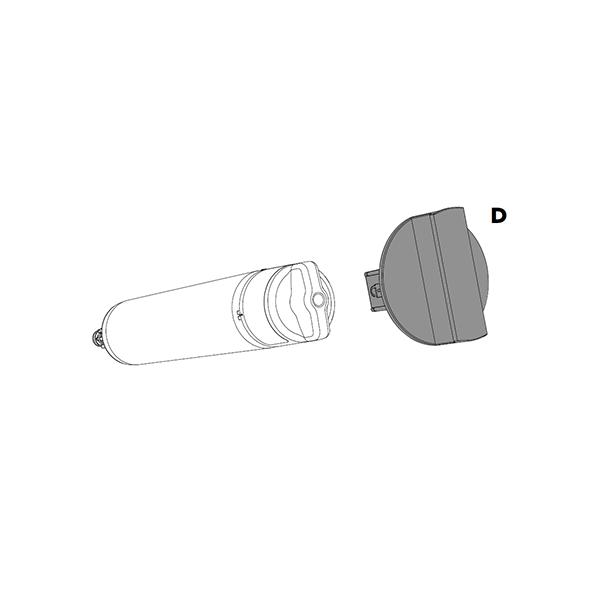
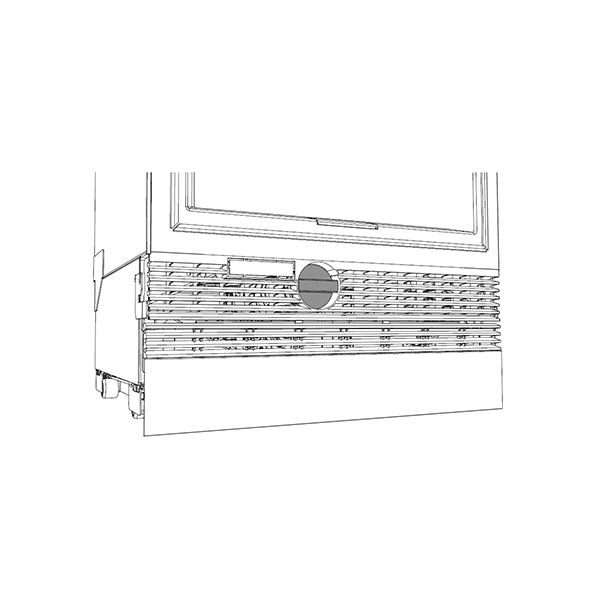
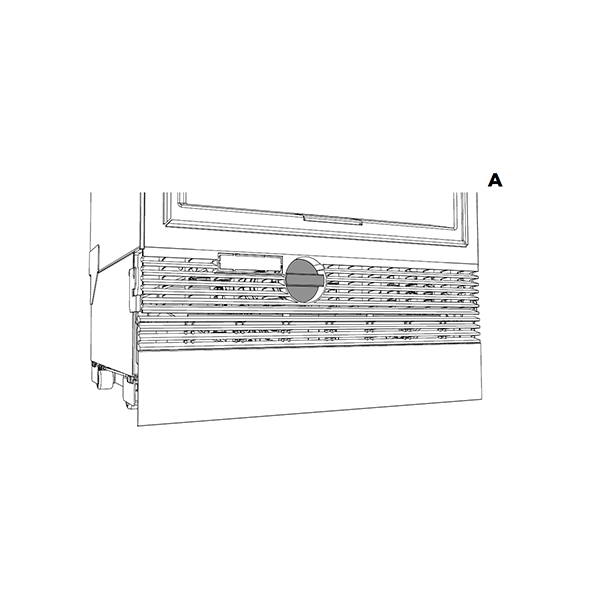
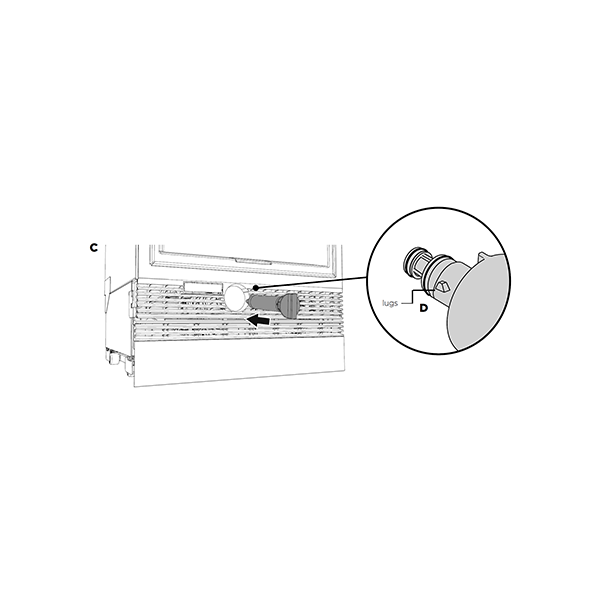
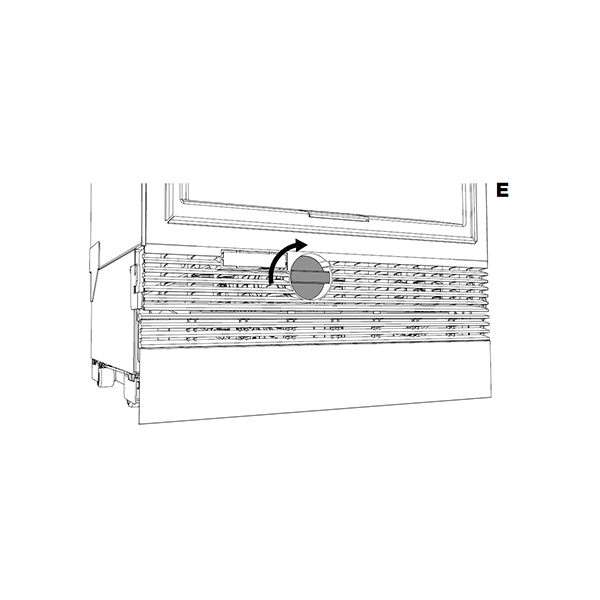
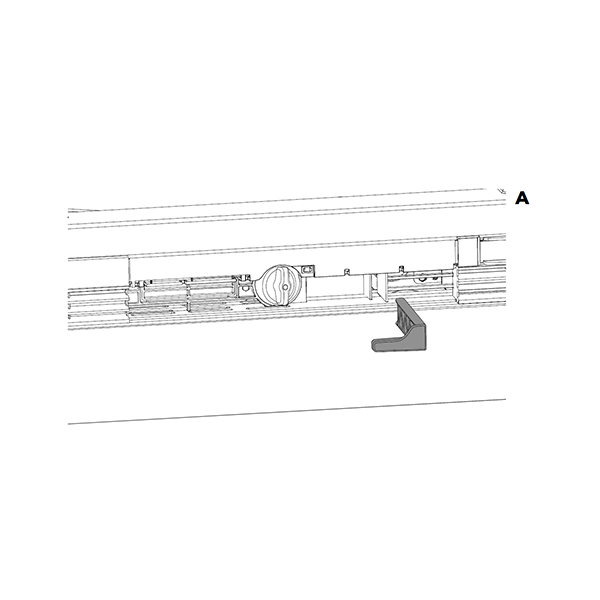
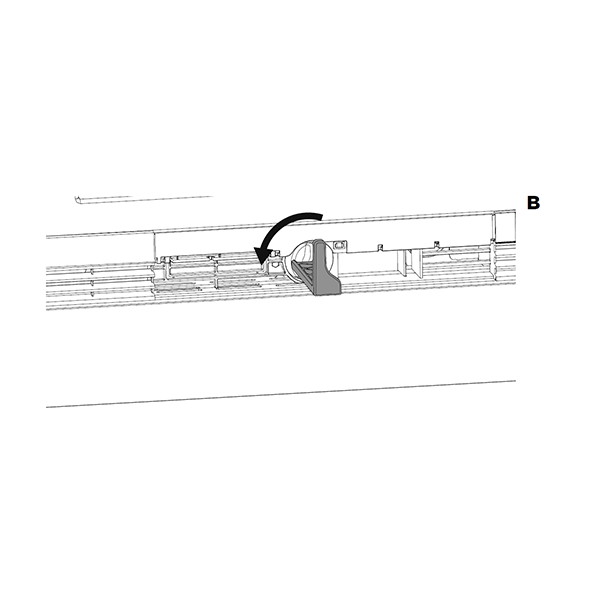
Note: It is not necessary to turn the water supply off when removing the water filter. It is easier to remove the water filter with the water turned on.
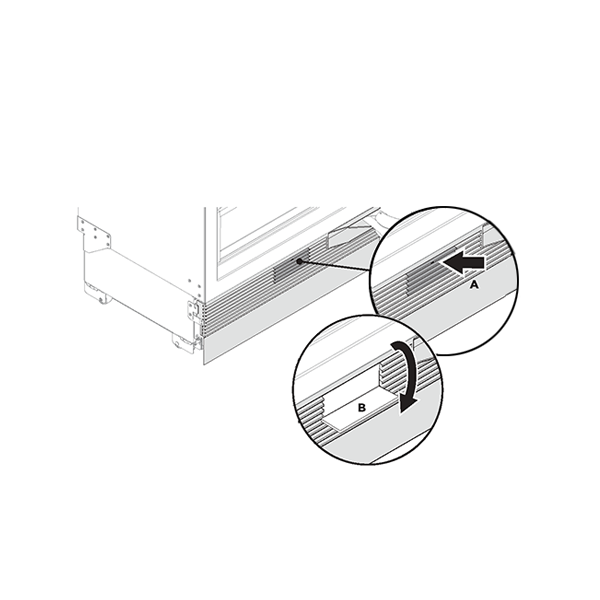
The filter is located behind the toe kick grille.
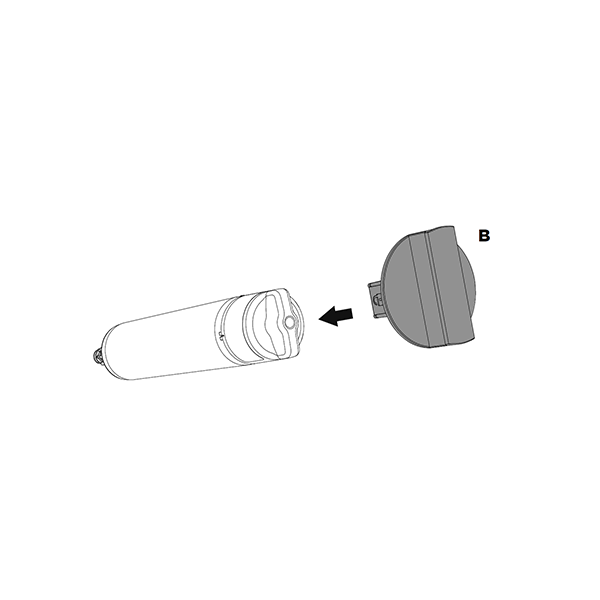
Note: It is not necessary to turn the water supply off when removing the water filter.
IMPORTANT!
After installation, the water filter
MUST
be flushed. Refer to
flushing the water filter
for more details.
For optimal performance, there is a requirement to flush 8L (2 gal) of water through your new water filter before use.
Flushing must be completed through both the water dispenser and ice maker.
Flushing must be completed through the ice maker.
For some models, a safety lockout feature may activate during the flushing of your water filter. If this occurs, wait a few minutes before dispensing again. For flushing information for your specific model, refer to your products User Guide.
Use the water filter as soon as possible after installation. A replacement indicator on the control panel and/or external display illuminates when you need to replace the filter. Reset the indicator only after replacing the filter.
To reset indicator
IMPORTANT!
We recommend the water filter to be used from the time of installation. Do not reset
indicator before filter is changed or filter monitoring will be innacurate.
IMPORTANT!
847200 – Certified by: IAPMO R&T against NSF/ANSI Standards 43, 53, 401 and CSA B4831.1 for the reduction of claims specified on the performance data sheet and at iapmort.org. 847200 compounds certified under NSF/ANSI 401 have been deemed as incidental contaminants/emerging compounds. Incidental contaminants are those compounds that have been detected in drinking water supplies at trace levels. While occurring at only trace levels, these compounds can affect the public acceptance of drinking quality water.
847201 – Certified by: IAPMO R&T against NSF/ANSI Standards 43 and CSA B4831.1 for the reduction of claims specified on the performance data sheet and at iapmort.org.
847200 – 102 gallons (386 litres) 847201 – 170 gallons (643 litres)
0.5 gpm (1.89 Lpm)
Replacement filter cartridges can be purchased online at fisherpaykel.com or by calling Fisher & Paykel Customer Care. Details of the replacement filter cartridge are labelled on the cartridge.
Fisher & Paykel Appliances Australia, Level 1, 1 Eden Park Drive, Macquarie Park
NSW 2113, Australia
You can talk with a support member now using the 'Live Chat' button on this page. Alternatively, call us on 1300 650 950.